Lighting is one of the most important things in photography. Especially for still life subjects, like food photography, a dynamic interaction between light and shadow create interest, help to tell stories and can even define our photography style. The choices we make with regards to lighting whilst planning and executing a photoshoot are key, so it's important to learn about different types of light and how to manipulate it. In this post we're going to look at the food photography lighting basics so you can make more informed choices in your photoshoots.
Why light is important in photography
When you take a photograph on any camera, you're essentially capturing light. The camera lens takes all the light rays bouncing around and uses glass inside the lens to redirect them to a single point, creating a sharp image. Since light is what enables us to take a photo at all, it's important to learn about the different kinds of light available in photography and how to manipulate it, so you can make the best choices during your shoot.
Food photography is usually a still-life scene, though we like to imply movement and action for more interesting and dynamic images. Shooting still-life has it's advantages; it gives us time to arrange our elements in the scene and adjust certain aspects of light as we go until we're happy.
Getting the lighting right is notoriously one of the most difficult things to understand in photography, especially when you're just starting out. That's why we're going to go through the food photography lighting basics, starting with the difference between natural and artificial light, then looking at hard and soft light, how the direction of light affects your images and also warm and cool light. Finally, we'll also look at how you can intentionally reflect light back into your scene to create different moods.
How to do food photography at home
Natural vs artificial light
In food photography you'll hear most people talking about two kinds of light sources: natural and artificial light.
Natural light is the light we get from the sun. During daylight hours we can shoot anywhere where there is sunlight, both outdoors and indoors. Natural light is free and abundant all over the world, meaning that anyone anywhere can use it to take photos. The main problem with natural light is that it can be unpredictable because we cannot control the weather. It might be cloudy and raining one day, and beautifully sunny the next - and these differences in weather affect how the light shines into your scene. We'll talk more about this later.
Artificial light comes from lamps and any other technology that produces light. This kind of light can be used at any time of day or night, making it much more stable than natural light. It means that you're not dependent on the weather outside when shooting, or confined to the number of hours of light you have (which are fewer in winter!). The downsides of artificial light, however, are that it's expensive to buy the equipment and it takes time to learn to shoot well with it.
The decision to use natural or artificial light in food photography is personal and there is certainly no right or wrong answer. I've tried both and can see advantages and disadvantages of each:
Enter your text here... | Advantages | Disadvantages |
|---|---|---|
Natural Light | Free | Unpredictable (due to weather, seasons, time of day) |
Artificial Light | More control and stability | Expensive equipment |
As I mentioned, one type of lighting is not necessarily better than the other. When you learn how to use and manipulate light, you can achieve beautiful, realistic and creative images with both light sources. If you're interested in learning how to work and shoot with artificial light there are lots of online tutorials and courses that can teach you! Joanie Simon from The Bite Shot has a paid course called Artificial Light Academy that lots of people in the food photography community have recommended, and her YouTube channel is packed with amazing videos teaching all sorts of things related to food photography!
The images below are mine, one was taken in natural light and one was taken in artificial light - can you guess which is which?
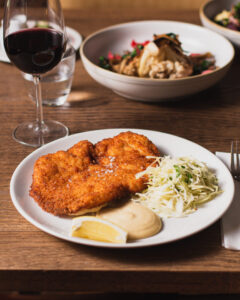
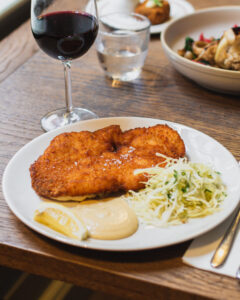
The answer is at the end of this post 😉
Hard and soft light
In food photography we also often talk about hard/harsh and soft light, or sometimes it's referred to as direct and indirect light.
Hard light
Hard light is when the light source is hitting the object you're shooting directly, with nothing in between to block or diffuse the light. For example, on a clear sunny day the sun will shine directly through your window and create strong, harsh shadows in the room.
You can see in the image below how the direct sunlight creates strong shadows that have a defined outline and pick up the patterns in the glassware really nicely.

Hard/direct light creates strong, high contrast shadows
If you're shooting with natural light, you will need direct sunlight to create this kind of image. As soon as there are any clouds in the sky, no matter how thin they are, the shadows will becomes softer. Remember that the sun will always keep moving, so you'll need to shoot quickly and be prepared to move your scene around!
To create this effect with artificial light you'll need small, strong light source. Here are two great videos with some tips on creating hard light photos with both natural and artificial light:
- Hard light (direction and shadows) with Lauren Caris
- Hard light (natural and artificial light) with Joanie Simon
Harsh light is good for creating summery, tropical scenes and is also often used in product photography. If you want to work with brands you might find that they ask for imagery shot in harsh light for seasonal marketing campaigns. It's a lot of fun to play around with and definitely adds variety to your work, so give it a try!
Don't know where to start?
My online food photography course is designed for beginners and has a module dedicated to working with natural light.
Soft light
Soft light is when the light source is diffused, causing the light source to become bigger and spread across a larger area. As a result, the shadows are softer and don't have defined edges. It's probably the most commonly used type of lighting in food photography.
When shooting with natural light, you can create soft lighting by shooting when the sun is covered by clouds, by shooting near a window that doesn't face the sun, or by hanging a light sheet or diffuser in front of your window. Moving your scene further away from the window will also create softer shadows.
Learn more about modifiers for natural light
If you're shooting with artificial light, you can create soft light by using a larger light source and placing it further away from your scene, or by using diffuser material in front of the bulb.
Look at the images below and notice the difference in light compared to the image above where I demonstrated hard light. Can you see how the shadows are much softer and less defined?
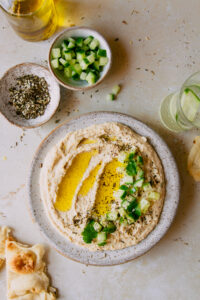
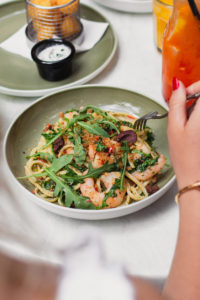
Choosing to use hard or soft light in your images comes down to your personal style and the story you want to tell. Personally, I usually shoot in soft light because I love how it looks and fits better with my style. However, learning how to work with hard light is really fun and is great for creating unique, seasonal images.
Direction of light
Another aspect of food photography lighting basics that you need to know about is the direction of light. The direction from which light enters your scene will affect where the shadows fall and how the highlights (the brighter areas) are captured.
Side light
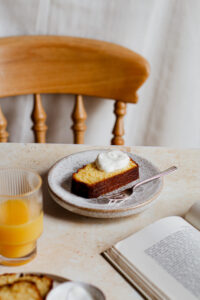
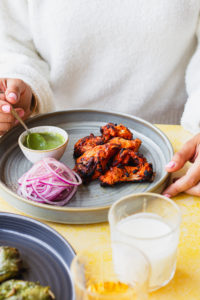
Side light is when the light enters the scene from the left or right side. You can place your scene on a table perpendicular to your window or place an artificial lighting set up on the left- or right-hand side.
This is a very common way to light food because it works well for pretty much all types of food and scenes! I use it a lot and it's a simple place to start if you're new to photography. The two images below are examples of left and right side light.
Backlight
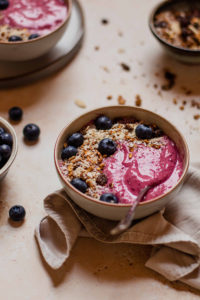
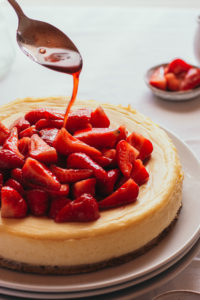
Backlight is when the light enters the scene from the back, opposite the camera. This is great when the food you're shooting has lots of textures as the highlights and shadows are beautifully captured. I also love using backlight for drinks photography since the light is reflected off the liquid and through the glass.
Below are examples of how I've used backlight in my own images. See how the textures and highlights have been captured and create interest in the food and drink.
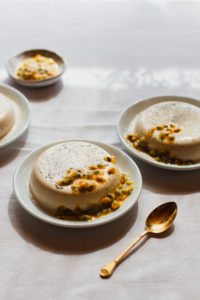
You can also move between side- and backlight to create diagonal shadows, it's all down to your own creative decisions, what the main subject in your image is and the story you want to tell.
Warm and cool light
Next up for food photography lighting basics is the colour of light. Light has a colour tint and the relative warmness of coolness of light is called colour temperature. The human eye doesn't typically see the differences in colour temperature, but the camera does capture it and so it's noticeable in photography.
Colour temperature is measured in Kelvin and ranges from 10,000K which is a blue similar to that on a clear, sunny day, to 1,000K which is an orange-yellow like a candle flame.
In daylight hours, the early morning and late afternoon light are typically warmer (this is why those times of day are also known as the "golden hour"), whereas before sunrise, at midday and after sunset the light is more blue. Once you start shooting at different times of day you'll quickly see the changes in colour temperature in your images.
Adjusting colour temperature in your images
In your camera, you'll notice something called "white balance" and this refers to the colour temperature that it will capture. In digital cameras you can adjust the white balance to match the conditions you're shooting in (e.g. direct sunlight, shade, fluorescent light) or you can shoot in auto mode and the camera will look for a neutral grey colour and set the white balance it thinks is most appropriate to create a neutral, natural looking image.
You can also adjust the white balance in editing. Most editing software will have a colour temperature slider where you can make the image warmer or cooler to your liking. I usually shoot with white balance set to auto in my camera and adjust the temperature when I edit my images.
How warm or cool you make your images is totally up to you! Some people prefer cooler, bluer tones whereas others like warmer, yellow tones. A fresh, iced drink could be edited with cooler tones to make it look more refreshing, or it could be edited with warmer tones to reflect the summer's day on which it's enjoyed. Your decision might depend on the subject; a bowl of sorbet or ice cream might fit cool blue tones, whereas a cosy mug of hot chocolate might go better with warm orange-yellow tones. Another deciding factor might be seasonal; warm colour temperature for summer months and cool colour temperature for winter months.
The two images below have had exactly the same edits applied except for the colour temperature. The one on the left is cooler compared to the one of the right, which is warmer. Which one do you prefer?
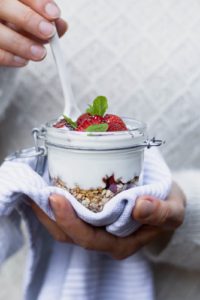
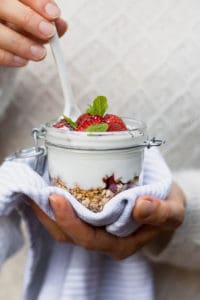
Experiment and play with the colour temperature slider when editing images and see what you like the look of!
Reflectors and bounce-boards
In addition to the light source that we choose to shoot with, we can use other tools to further manipulate the light in our food photography scenes.
Reflectors and bounce-boards are often used to re-direct light back into the scene to either:
- add light by filling in the shadows, or
- intensify and deepen the shadows.
By simply using a large piece of white or black card and placing it opposite your light source but near your subject (but still outside of the frame), you will be able to make some slight adjustments to the light and shadows captured.
When to use reflectors and bounce-boards
White reflectors are often used to create images that have a bright and airy feel to them. This is because they bounce the light back into the shadows (or "fill in" the shadows), making them appear less dark and reducing the contrast. If you want to create light and bright food photos, be careful not to completely cancel out the shadows as this can make your images appear flat and lifeless.
Black boards can be used to intensify and deepen the shadows already present, so these are often used to create more dark and moody images. This is called "negative fill".
You can also use the boards (and other boxes or items) to deliberately block light in certain parts of your scene and direct the viewer's attention to the main subject.

In this image I blocked the light at the top right of the image to direct more attention to the asparagus. I was also wearing a black jumper which made the shadows on the left side deeper and darker.
Activities to learn about light
If you're an absolute beginner, here are some activities to help you learn the food photography lighting basics. The more you practice the better you'll understand all the concepts we've talked about, and over time you'll be able to make more informed decisions.
I suggest starting out with natural light, since it's free and easy to find. Look for a light source in your home, such as a large window, and first make notes of how the light moves through this window during the course of the day. Does the sun shine directly through the window? If so, at what time?
Next, pull up a table near the window you've been observing, between 1-3 metres away. Grab your camera and anything in your home (a piece of fruit, a vegetable or even a book or candle) and start playing! Take pictures of the object at different times of day and notice how the colour temperature changes, how the length of the shadows are shorter at midday and then get longer in the mornings and evenings. Move around your subject and notice how side- and backlight accentuate different parts of your object.
The best way to really understand how to use bounce-boards and reflectors is to grab some white and black pieces of card and play with a simple object. First, take a photo with the light as it is on its own. Then place the white card opposite the light source, close to your subject and take another shot. Do the same with the black card and then compare the three images. Can you see how the white and black cards affect the shadows differently and change the overall image? Think about your own photography style and what kind of images you prefer to create - would the use of reflectors and bounce-boards help you achieve them?
In the right-hand image below, you can see the effect of placing a white bounce board to the right, outside of the frame; the shadows aren't as deep as in the image on the left, creating less contrast.
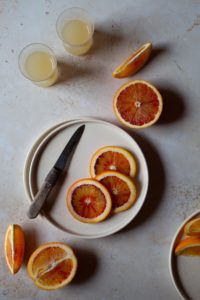
I hope you enjoyed this post about food photography lighting basics! If you have any questions or comments please leave them below, I'd love to hear from you!
Answer to lighting question: the image on the left was taken in artificial light and the image on the right was taken with natural light.

0 comments