Doing food photography with natural light creates beautiful and authentic images, but working with natural light can have its challenges! In this post we're going to look at tools you can use to modify and shape natural light to create interest in your images and get the mood you're after.
Natural vs artificial light Let's start by clarifying the difference between natural and artificial light.
Food photographers can use either natural or artificial light in their shoots. One is not "better" than the other in terms of the quality of images you can shoot, nor are there limitations in the kind of content you can create with either choice.
Food photography with natural light simply means that you are using sunlight to light your scene. It doesn't matter if it's sunny or cloudy - any kind of daylight or light from the sun is considered natural light.
Artificial light refers to any light that comes from lamps or technology. There are many types of artificial lights and they're usually used in food photography to recreate the look and feel of natural light.
To learn about the advantages and disadvantages of working with natural or artificial light, as well as a general introduction to light, then read my blog post about Lighting Basics for Food Photography .
In this post we're going to focus on food photography with natural light and talk about different tools you can use to change the way it interacts with your scenes. These tools are often called "modifiers" in the photography industry.
What are modifiers? A modifier in photography is anything the modifies or changes the light that is being used to light the subject.
You might be wondering, why would I want to change the light?
Well, there are a number of reasons why you might want to manually modify the light when shooting.
Firstly, when working with natural light we don't have control over the weather on the day and that can cause problems sometimes! For example, perhaps you were planning on creating a calm breakfast scene with soft light, but it's a really sunny day. In this instance you would use a modifier to diffuse the light, turning it from hard light with strong shadows to soft light and low-contrast shadows.
Secondly, light has a really big impact on the overall mood of an image or series of images. When you're going into a photoshoot, chances are you have an idea in your mind about how you want the images to look; light and bright or darker and moody (or even something in between!). If you're really organised, you might even have planned the shoot in advance and know which direction the light will come from, what kind of light it is (i.e. hard or soft) and how deep the shadows should be. By intentionally using modifiers, you'll find it easier to bring these visions to life by shaping the light to generate the mood you want.
Thirdly, storytelling is key in photography and light plays a major role in building an engaging story . If you've read any of my other blog posts you'll know I bang on about this topic, but I do so because it's essential if you want to have a chance at evoking an emotional response from your audience. The type of light and shadows can instantly provide a lot of context to a static image and changes the energy in the frame. Hard light can create sunny, vibrant and exciting images, whereas soft light is well-suited to calm, romantic and everyday images.
Let's take a look at some different modifiers that can be used for food photography with natural light , how they could be used to change the mood of your scene and strengthen your storytelling.
Need more help? My online food photography course is designed for beginners and has a module dedicated to shooting with natural light!
Types of modifiers Clouds Yes, clouds can act as a natural modifier for sunlight! Clouds block or decrease the intensity of the light coming from the sun, resulting in soft, diffused light which is ideal for food photography.
Of course, clouds come in various forms and their inconsistencies can be tricky to work with.
For example, where I live in the UK we get days where it's partly sunny and partly cloudy, which means that the light can change suddenly from hard light (no clouds) to soft light (clouds covering the sun) multiple times during a shoot.
On the other hand, we also get very overcast days, which is better because the diffused light is consistent (but it can be very dark, especially in winter).
<img data-lazy-fallback="1" class="tve_image wp-image-4343" alt="" data-id="4343" width="768" height="1024" title="natural-light-food-photography" src="https://lindahermansphotography.com/wp-content/uploads/2021/11/natural-light-food-photography.jpeg" data-src="https://lindahermansphotography.com/wp-content/uploads/2021/11/natural-light-food-photography.jpeg" loading="lazy" data-sizes="{"thumbnail":{"height":150,"width":150,"url":"https://lindahermansphotography.com/wp-content/uploads/2021/11/natural-light-food-photography-150x150.jpeg","orientation":"landscape"},"medium":{"height":300,"width":225,"url":"https://lindahermansphotography.com/wp-content/uploads/2021/11/natural-light-food-photography-225x300.jpeg","orientation":"portrait"},"full":{"url":"https://lindahermansphotography.com/wp-content/uploads/2021/11/natural-light-food-photography.jpeg","height":1024,"width":768,"orientation":"portrait"}}" srcset="https://i0.wp.com/lindahermansphotography.com/wp-content/uploads/2021/11/natural-light-food-photography.jpeg?w=768&ssl=1 768w, https://i0.wp.com/lindahermansphotography.com/wp-content/uploads/2021/11/natural-light-food-photography.jpeg?resize=225%2C300&ssl=1 225w, https://i0.wp.com/lindahermansphotography.com/wp-content/uploads/2021/11/natural-light-food-photography.jpeg?resize=750%2C1000&ssl=1 750w" sizes="(max-width: 768px) 100vw, 768px" />
Shooting on a cloudy day for soft light
<img data-lazy-fallback="1" class="tve_image wp-image-4344" alt="" data-id="4344" width="1066" height="1600" title="Drinks photography natural light" src="https://lindahermansphotography.com/wp-content/uploads/2021/11/Drinks-photography-natural-light-682x1024.jpeg" data-src="https://lindahermansphotography.com/wp-content/uploads/2021/11/Drinks-photography-natural-light-682x1024.jpeg" loading="lazy" data-sizes="{"thumbnail":{"height":150,"width":150,"url":"https://lindahermansphotography.com/wp-content/uploads/2021/11/Drinks-photography-natural-light-150x150.jpeg","orientation":"landscape"},"medium":{"height":300,"width":200,"url":"https://lindahermansphotography.com/wp-content/uploads/2021/11/Drinks-photography-natural-light-200x300.jpeg","orientation":"portrait"},"large":{"height":1024,"width":682,"url":"https://lindahermansphotography.com/wp-content/uploads/2021/11/Drinks-photography-natural-light-682x1024.jpeg","orientation":"portrait"},"full":{"url":"https://lindahermansphotography.com/wp-content/uploads/2021/11/Drinks-photography-natural-light.jpeg","height":1600,"width":1066,"orientation":"portrait"}}" srcset="https://i0.wp.com/lindahermansphotography.com/wp-content/uploads/2021/11/Drinks-photography-natural-light.jpeg?resize=682%2C1024&ssl=1 682w, https://i0.wp.com/lindahermansphotography.com/wp-content/uploads/2021/11/Drinks-photography-natural-light.jpeg?resize=200%2C300&ssl=1 200w, https://i0.wp.com/lindahermansphotography.com/wp-content/uploads/2021/11/Drinks-photography-natural-light.jpeg?resize=768%2C1153&ssl=1 768w, https://i0.wp.com/lindahermansphotography.com/wp-content/uploads/2021/11/Drinks-photography-natural-light.jpeg?resize=1023%2C1536&ssl=1 1023w, https://i0.wp.com/lindahermansphotography.com/wp-content/uploads/2021/11/Drinks-photography-natural-light.jpeg?resize=750%2C1126&ssl=1 750w, https://i0.wp.com/lindahermansphotography.com/wp-content/uploads/2021/11/Drinks-photography-natural-light.jpeg?resize=360%2C540&ssl=1 360w, https://i0.wp.com/lindahermansphotography.com/wp-content/uploads/2021/11/Drinks-photography-natural-light.jpeg?w=1066&ssl=1 1066w" sizes="(max-width: 1066px) 100vw, 1066px" />
Final image
I try to check the weather forecast for the next few days and choose which days I'm going to shoot on based on whether it will be cloudy or sunny.
Alternatively, if you have more than one space where you can set up your shoot, you could simply choose the room with a window but where there is no direct sunlight - this would also naturally soften the light. Just be careful if it's sunny and cloudy because the colour temperature of the room will change (warmer when it's sunny and cooler when it's cloudy).
Sheets and curtains A very cheap and simple way to diffuse the light is by using items in your home, such as sheets, curtains and blinds.
I recommend using white or neutral materials to prevent any unwanted colour spilling into your scene. Thin materials are also best, so that you don't block too much light and end up making the scene very dark.
The curtains in the rooms that I shoot in are either very thick or coloured, so I tend to roll them up during a shoot and then hang a thin white sheet in the window. This diffuses the light on very bright or sunny days just enough to soften the shadows and prevents any highlights from getting blown out.
Diffusers You can buy diffusers made especially for photography; there are many brands to choose from and they come in various shapes and sizes. They will do the same as white sheets and curtains and can be placed in front of windows to create consistent, soft light in your room.
Photography diffusers are handy because they are lightweight, easy to fold up and store with your equipment, and they often come with additional covers and reflectors.
<img data-lazy-fallback="1" class="tve_image wp-image-4340" alt="natural light food photography diffusers" data-id="4340" width="768" height="1024" title="Light-modifiers-food-photography" src="https://lindahermansphotography.com/wp-content/uploads/2021/11/Light-modifiers-food-photography.jpeg" data-src="https://lindahermansphotography.com/wp-content/uploads/2021/11/Light-modifiers-food-photography.jpeg" loading="lazy" data-sizes="{"thumbnail":{"height":150,"width":150,"url":"https://lindahermansphotography.com/wp-content/uploads/2021/11/Light-modifiers-food-photography-150x150.jpeg","orientation":"landscape"},"medium":{"height":300,"width":225,"url":"https://lindahermansphotography.com/wp-content/uploads/2021/11/Light-modifiers-food-photography-225x300.jpeg","orientation":"portrait"},"full":{"url":"https://lindahermansphotography.com/wp-content/uploads/2021/11/Light-modifiers-food-photography.jpeg","height":1024,"width":768,"orientation":"portrait"}}" srcset="https://i0.wp.com/lindahermansphotography.com/wp-content/uploads/2021/11/Light-modifiers-food-photography.jpeg?w=768&ssl=1 768w, https://i0.wp.com/lindahermansphotography.com/wp-content/uploads/2021/11/Light-modifiers-food-photography.jpeg?resize=225%2C300&ssl=1 225w, https://i0.wp.com/lindahermansphotography.com/wp-content/uploads/2021/11/Light-modifiers-food-photography.jpeg?resize=750%2C1000&ssl=1 750w" sizes="(max-width: 768px) 100vw, 768px" />
Sheet and diffuser to soften the light
<img data-lazy-fallback="1" class="tve_image wp-image-4342" alt="" data-id="4342" width="1066" height="1600" title="Linda Hermans Photography-Pineapple upside down cake" src="https://lindahermansphotography.com/wp-content/uploads/2021/11/Linda-Hermans-Photography-Pineapple-upside-down-cake-682x1024.jpeg" data-src="https://lindahermansphotography.com/wp-content/uploads/2021/11/Linda-Hermans-Photography-Pineapple-upside-down-cake-682x1024.jpeg" loading="lazy" data-sizes="{"thumbnail":{"height":150,"width":150,"url":"https://lindahermansphotography.com/wp-content/uploads/2021/11/Linda-Hermans-Photography-Pineapple-upside-down-cake-150x150.jpeg","orientation":"landscape"},"medium":{"height":300,"width":200,"url":"https://lindahermansphotography.com/wp-content/uploads/2021/11/Linda-Hermans-Photography-Pineapple-upside-down-cake-200x300.jpeg","orientation":"portrait"},"large":{"height":1024,"width":682,"url":"https://lindahermansphotography.com/wp-content/uploads/2021/11/Linda-Hermans-Photography-Pineapple-upside-down-cake-682x1024.jpeg","orientation":"portrait"},"full":{"url":"https://lindahermansphotography.com/wp-content/uploads/2021/11/Linda-Hermans-Photography-Pineapple-upside-down-cake.jpeg","height":1600,"width":1066,"orientation":"portrait"}}" srcset="https://i0.wp.com/lindahermansphotography.com/wp-content/uploads/2021/11/Linda-Hermans-Photography-Pineapple-upside-down-cake.jpeg?resize=682%2C1024&ssl=1 682w, https://i0.wp.com/lindahermansphotography.com/wp-content/uploads/2021/11/Linda-Hermans-Photography-Pineapple-upside-down-cake.jpeg?resize=200%2C300&ssl=1 200w, https://i0.wp.com/lindahermansphotography.com/wp-content/uploads/2021/11/Linda-Hermans-Photography-Pineapple-upside-down-cake.jpeg?resize=768%2C1153&ssl=1 768w, https://i0.wp.com/lindahermansphotography.com/wp-content/uploads/2021/11/Linda-Hermans-Photography-Pineapple-upside-down-cake.jpeg?resize=1023%2C1536&ssl=1 1023w, https://i0.wp.com/lindahermansphotography.com/wp-content/uploads/2021/11/Linda-Hermans-Photography-Pineapple-upside-down-cake.jpeg?resize=750%2C1126&ssl=1 750w, https://i0.wp.com/lindahermansphotography.com/wp-content/uploads/2021/11/Linda-Hermans-Photography-Pineapple-upside-down-cake.jpeg?resize=360%2C540&ssl=1 360w, https://i0.wp.com/lindahermansphotography.com/wp-content/uploads/2021/11/Linda-Hermans-Photography-Pineapple-upside-down-cake.jpeg?w=1066&ssl=1 1066w" sizes="(max-width: 1066px) 100vw, 1066px" />
Final image
Bounce-boards & reflectors Bounce-boards and reflectors are used around the scene to make finer adjustments to the light and shadows in your set-up.
For example, white bounce-boards or reflectors can be used to brighten darker areas by filling in shadows or to create even light across the whole image. For example, placing a bounce-board opposite your light source and directing it towards areas that are too dark will fill those areas with light, making them brighter and more similar to other areas of your scene.
On the other hand, black bounce-boards can be used to intensify the shadows and make them darker , by reflecting the black colour into the scene. For example, if the light is too soft and your image feels flat you could use a black bounce-board to "fill in" the shadows and make them darker, adding dimension to your scene.
Photography bounce-boards and reflectors can be bought online or you can simply use card, foam core or even boxes and just paint them white or black!
<img data-lazy-fallback="1" class="tve_image wp-image-4339" alt="" data-id="4339" width="" height="" title="IMG_9657" src="https://lindahermansphotography.com/wp-content/uploads/2021/11/IMG_9657.jpeg" data-src="https://lindahermansphotography.com/wp-content/uploads/2021/11/IMG_9657.jpeg" loading="lazy" data-sizes="{}" />
Using boxes to shape the light and create a dark and moody image
<img data-lazy-fallback="1" class="tve_image wp-image-4346" alt="dark food photography" data-id="4346" width="1280" height="1600" title="Linda-Hermans-Photography-dark-and-moody-apricots" src="https://lindahermansphotography.com/wp-content/uploads/2021/11/Linda-Hermans-Photography-dark-and-moody-apricots-819x1024.jpeg" data-src="https://lindahermansphotography.com/wp-content/uploads/2021/11/Linda-Hermans-Photography-dark-and-moody-apricots-819x1024.jpeg" loading="lazy" data-sizes="{"thumbnail":{"height":150,"width":150,"url":"https://lindahermansphotography.com/wp-content/uploads/2021/11/Linda-Hermans-Photography-dark-and-moody-apricots-150x150.jpeg","orientation":"landscape"},"medium":{"height":300,"width":240,"url":"https://lindahermansphotography.com/wp-content/uploads/2021/11/Linda-Hermans-Photography-dark-and-moody-apricots-240x300.jpeg","orientation":"portrait"},"large":{"height":1024,"width":819,"url":"https://lindahermansphotography.com/wp-content/uploads/2021/11/Linda-Hermans-Photography-dark-and-moody-apricots-819x1024.jpeg","orientation":"portrait"},"full":{"url":"https://lindahermansphotography.com/wp-content/uploads/2021/11/Linda-Hermans-Photography-dark-and-moody-apricots.jpeg","height":1600,"width":1280,"orientation":"portrait"}}" srcset="https://i0.wp.com/lindahermansphotography.com/wp-content/uploads/2021/11/Linda-Hermans-Photography-dark-and-moody-apricots.jpeg?resize=819%2C1024&ssl=1 819w, https://i0.wp.com/lindahermansphotography.com/wp-content/uploads/2021/11/Linda-Hermans-Photography-dark-and-moody-apricots.jpeg?resize=240%2C300&ssl=1 240w, https://i0.wp.com/lindahermansphotography.com/wp-content/uploads/2021/11/Linda-Hermans-Photography-dark-and-moody-apricots.jpeg?resize=768%2C960&ssl=1 768w, https://i0.wp.com/lindahermansphotography.com/wp-content/uploads/2021/11/Linda-Hermans-Photography-dark-and-moody-apricots.jpeg?resize=1229%2C1536&ssl=1 1229w, https://i0.wp.com/lindahermansphotography.com/wp-content/uploads/2021/11/Linda-Hermans-Photography-dark-and-moody-apricots.jpeg?resize=750%2C938&ssl=1 750w, https://i0.wp.com/lindahermansphotography.com/wp-content/uploads/2021/11/Linda-Hermans-Photography-dark-and-moody-apricots.jpeg?w=1280&ssl=1 1280w" sizes="(max-width: 1280px) 100vw, 1280px" />
Final image
You can practice with one subject and use lighting and props to create a dark and moody image as well as a light and bright image.
Dark and moody images are best created with dark backdrops and props. Then you can block the light with bounce-boards or boxes to direct the light onto your subject to make it the focus point of your image.
Alternatively, you can use lighter backdrops and props to create a light and bright scene. Reflectors and white bound-boards can be used to brighten the scene or lift the shadows where they are too dark.
Of course, personal style and editing also comes into play - as you can see in my light and bright image below, I still like to have strong contrast in the shadows but the overall feel of the shot is much lighter than the other one.
<img data-lazy-fallback="1" class="tve_image wp-image-4345" alt="natural light in food photography dark and moody" data-id="4345" width="1066" height="1600" title="Dark-and-moody-food-photography-natural-light" src="https://lindahermansphotography.com/wp-content/uploads/2021/11/Dark-and-moody-food-photography-natural-light-682x1024.jpeg" data-src="https://lindahermansphotography.com/wp-content/uploads/2021/11/Dark-and-moody-food-photography-natural-light-682x1024.jpeg" loading="lazy" data-sizes="{"thumbnail":{"height":150,"width":150,"url":"https://lindahermansphotography.com/wp-content/uploads/2021/11/Dark-and-moody-food-photography-natural-light-150x150.jpeg","orientation":"landscape"},"medium":{"height":300,"width":200,"url":"https://lindahermansphotography.com/wp-content/uploads/2021/11/Dark-and-moody-food-photography-natural-light-200x300.jpeg","orientation":"portrait"},"large":{"height":1024,"width":682,"url":"https://lindahermansphotography.com/wp-content/uploads/2021/11/Dark-and-moody-food-photography-natural-light-682x1024.jpeg","orientation":"portrait"},"full":{"url":"https://lindahermansphotography.com/wp-content/uploads/2021/11/Dark-and-moody-food-photography-natural-light.jpeg","height":1600,"width":1066,"orientation":"portrait"}}" srcset="https://i0.wp.com/lindahermansphotography.com/wp-content/uploads/2021/11/Dark-and-moody-food-photography-natural-light.jpeg?resize=682%2C1024&ssl=1 682w, https://i0.wp.com/lindahermansphotography.com/wp-content/uploads/2021/11/Dark-and-moody-food-photography-natural-light.jpeg?resize=200%2C300&ssl=1 200w, https://i0.wp.com/lindahermansphotography.com/wp-content/uploads/2021/11/Dark-and-moody-food-photography-natural-light.jpeg?resize=768%2C1153&ssl=1 768w, https://i0.wp.com/lindahermansphotography.com/wp-content/uploads/2021/11/Dark-and-moody-food-photography-natural-light.jpeg?resize=1023%2C1536&ssl=1 1023w, https://i0.wp.com/lindahermansphotography.com/wp-content/uploads/2021/11/Dark-and-moody-food-photography-natural-light.jpeg?resize=750%2C1126&ssl=1 750w, https://i0.wp.com/lindahermansphotography.com/wp-content/uploads/2021/11/Dark-and-moody-food-photography-natural-light.jpeg?resize=360%2C540&ssl=1 360w, https://i0.wp.com/lindahermansphotography.com/wp-content/uploads/2021/11/Dark-and-moody-food-photography-natural-light.jpeg?w=1066&ssl=1 1066w" sizes="(max-width: 1066px) 100vw, 1066px" />
<img data-lazy-fallback="1" class="tve_image wp-image-4347" alt="natural light in food photography light and bright" data-id="4347" width="1000" height="1500" title="Linda-Hermans-Photography-Light-and-Bright-Apricots" src="https://lindahermansphotography.com/wp-content/uploads/2021/11/Linda-Hermans-Photography-Light-and-Bright-Apricots-683x1024.jpeg" data-src="https://lindahermansphotography.com/wp-content/uploads/2021/11/Linda-Hermans-Photography-Light-and-Bright-Apricots-683x1024.jpeg" loading="lazy" data-sizes="{"thumbnail":{"height":150,"width":150,"url":"https://lindahermansphotography.com/wp-content/uploads/2021/11/Linda-Hermans-Photography-Light-and-Bright-Apricots-150x150.jpeg","orientation":"landscape"},"medium":{"height":300,"width":200,"url":"https://lindahermansphotography.com/wp-content/uploads/2021/11/Linda-Hermans-Photography-Light-and-Bright-Apricots-200x300.jpeg","orientation":"portrait"},"large":{"height":1024,"width":683,"url":"https://lindahermansphotography.com/wp-content/uploads/2021/11/Linda-Hermans-Photography-Light-and-Bright-Apricots-683x1024.jpeg","orientation":"portrait"},"full":{"url":"https://lindahermansphotography.com/wp-content/uploads/2021/11/Linda-Hermans-Photography-Light-and-Bright-Apricots.jpeg","height":1500,"width":1000,"orientation":"portrait"}}" srcset="https://i0.wp.com/lindahermansphotography.com/wp-content/uploads/2021/11/Linda-Hermans-Photography-Light-and-Bright-Apricots.jpeg?resize=683%2C1024&ssl=1 683w, https://i0.wp.com/lindahermansphotography.com/wp-content/uploads/2021/11/Linda-Hermans-Photography-Light-and-Bright-Apricots.jpeg?resize=200%2C300&ssl=1 200w, https://i0.wp.com/lindahermansphotography.com/wp-content/uploads/2021/11/Linda-Hermans-Photography-Light-and-Bright-Apricots.jpeg?resize=768%2C1152&ssl=1 768w, https://i0.wp.com/lindahermansphotography.com/wp-content/uploads/2021/11/Linda-Hermans-Photography-Light-and-Bright-Apricots.jpeg?resize=750%2C1125&ssl=1 750w, https://i0.wp.com/lindahermansphotography.com/wp-content/uploads/2021/11/Linda-Hermans-Photography-Light-and-Bright-Apricots.jpeg?resize=360%2C540&ssl=1 360w, https://i0.wp.com/lindahermansphotography.com/wp-content/uploads/2021/11/Linda-Hermans-Photography-Light-and-Bright-Apricots.jpeg?w=1000&ssl=1 1000w" sizes="(max-width: 1000px) 100vw, 1000px" />
Homemade GOBOs A term that is popping up a lot in recent food photography content online is GOBO which is short for "go before optics". A GOBO basically anything that you put in-between your light source and your subject.
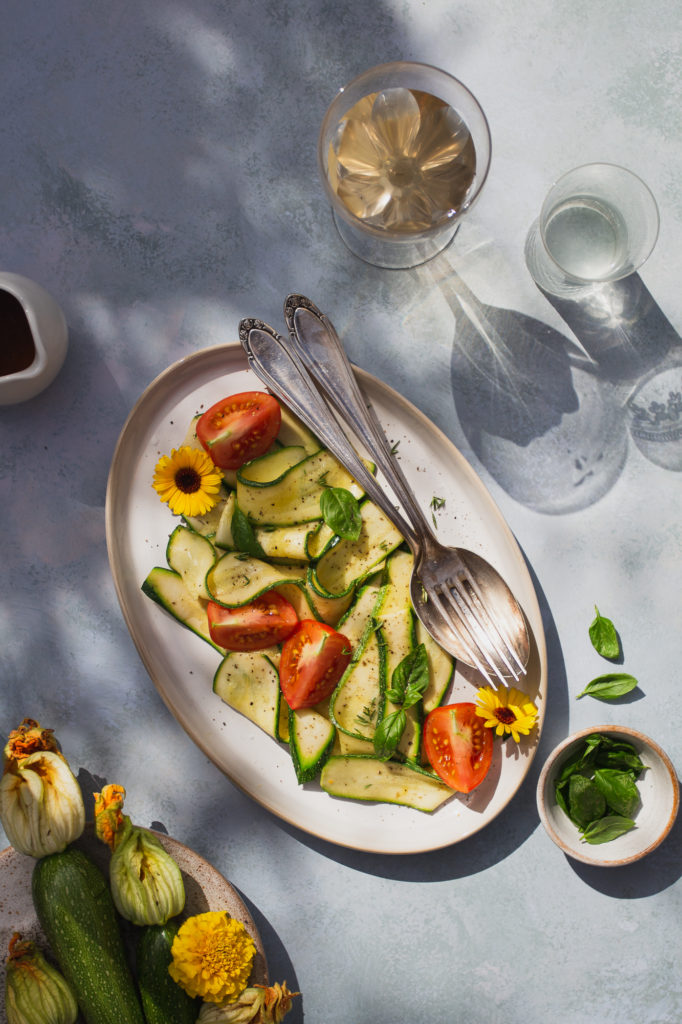
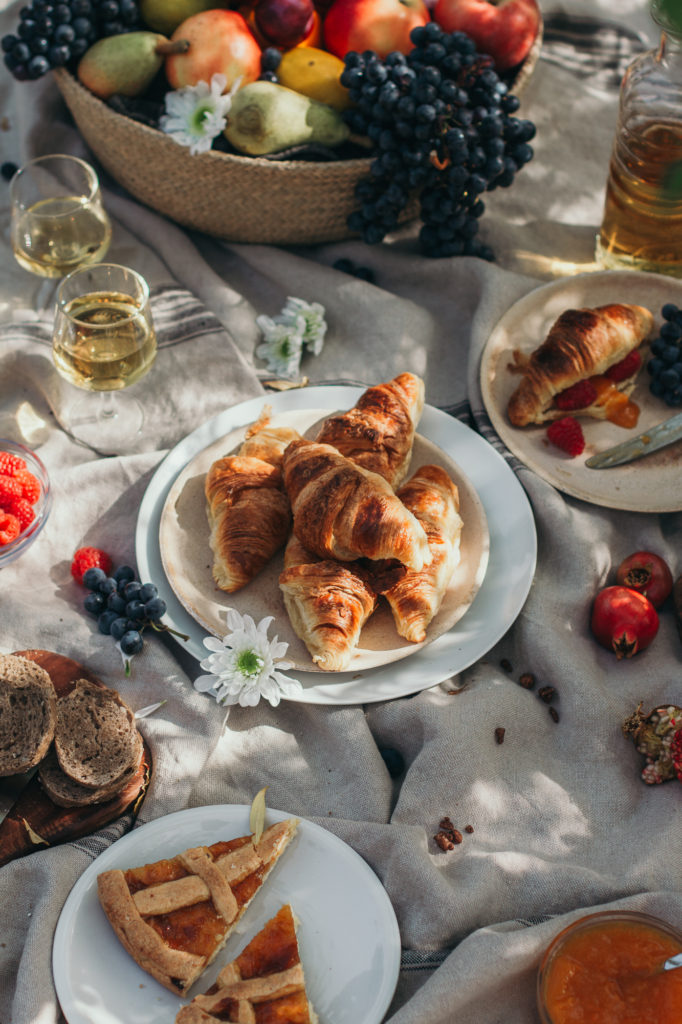
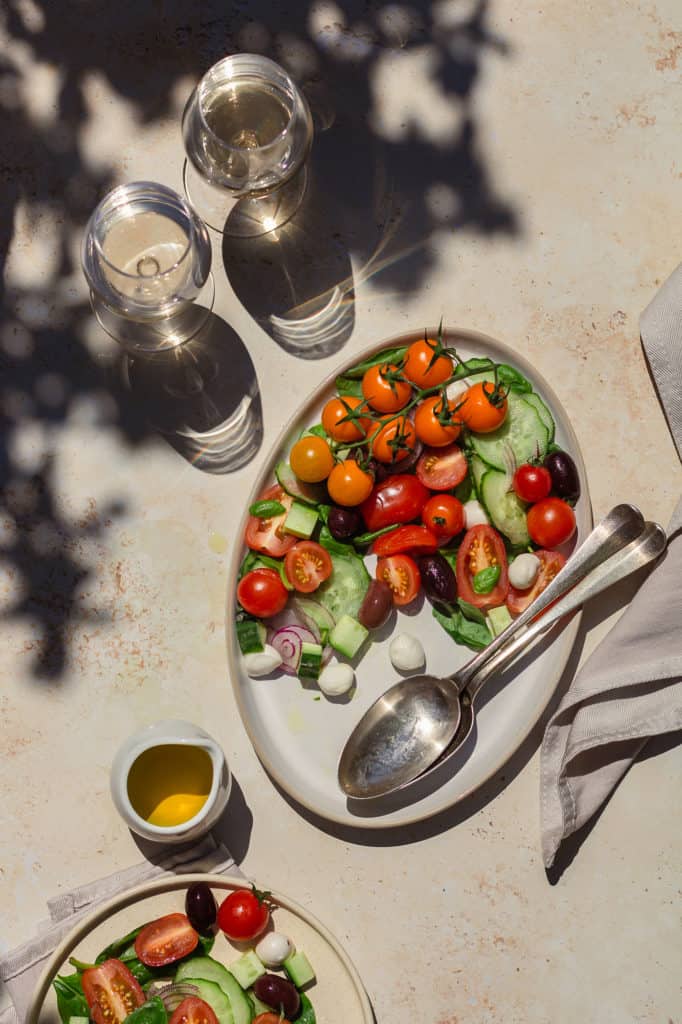
I've often used plants and trees when shooting outside as a GOBO to create a beautiful dappled light effect. But you can easily recreate this look with a handmade GOBO by cutting shapes into cardboard or holding up artificial leaves in front of your light source.
Lauren Caris Short has a quick video about working with GOBOs that you might find helpful!
Household objects As you may now have realised, it's not necessary to buy lots of expensive photography equipment to experiment with light and manipulate it!
Aside from the boxes, card and foam core mentioned above, you can use lots of household items to create interesting light in your scenes. Look around your environment and get creative!
Especially when working with hard light, there are many ways to create unique shadows and patterns with plants and leaves, window frames, blinds and I've even seen people shining light through cheese graters to create a dappled light effect!
<img data-lazy-fallback="1" class="tve_image wp-image-5741" alt="" data-id="5741" width="1333" height="2000" title="Courgette ribbons with tomaotes, basil and vinaigrette in hard l" src="https://lindahermansphotography.com/wp-content/uploads/2022/09/Linda-Hermans-Photography-Summer-Courgette-Ribbons-1-682x1024.jpg" data-src="https://lindahermansphotography.com/wp-content/uploads/2022/09/Linda-Hermans-Photography-Summer-Courgette-Ribbons-1-682x1024.jpg" loading="lazy" data-sizes="{"thumbnail":{"height":150,"width":150,"url":"https://lindahermansphotography.com/wp-content/uploads/2022/09/Linda-Hermans-Photography-Summer-Courgette-Ribbons-1-150x150.jpg","orientation":"landscape"},"medium":{"height":300,"width":200,"url":"https://lindahermansphotography.com/wp-content/uploads/2022/09/Linda-Hermans-Photography-Summer-Courgette-Ribbons-1-200x300.jpg","orientation":"portrait"},"large":{"height":1024,"width":682,"url":"https://lindahermansphotography.com/wp-content/uploads/2022/09/Linda-Hermans-Photography-Summer-Courgette-Ribbons-1-682x1024.jpg","orientation":"portrait"},"full":{"url":"https://lindahermansphotography.com/wp-content/uploads/2022/09/Linda-Hermans-Photography-Summer-Courgette-Ribbons-1.jpg","height":2000,"width":1333,"orientation":"portrait"}}" data-css="tve-u-1831de335cc" srcset="https://i0.wp.com/lindahermansphotography.com/wp-content/uploads/2022/09/Linda-Hermans-Photography-Summer-Courgette-Ribbons-1.jpg?resize=682%2C1024&ssl=1 682w, https://i0.wp.com/lindahermansphotography.com/wp-content/uploads/2022/09/Linda-Hermans-Photography-Summer-Courgette-Ribbons-1.jpg?resize=200%2C300&ssl=1 200w, https://i0.wp.com/lindahermansphotography.com/wp-content/uploads/2022/09/Linda-Hermans-Photography-Summer-Courgette-Ribbons-1.jpg?resize=768%2C1152&ssl=1 768w, https://i0.wp.com/lindahermansphotography.com/wp-content/uploads/2022/09/Linda-Hermans-Photography-Summer-Courgette-Ribbons-1.jpg?resize=1024%2C1536&ssl=1 1024w, https://i0.wp.com/lindahermansphotography.com/wp-content/uploads/2022/09/Linda-Hermans-Photography-Summer-Courgette-Ribbons-1.jpg?w=1333&ssl=1 1333w" sizes="(max-width: 1333px) 100vw, 1333px" />
<img data-lazy-fallback="1" class="tve_image wp-image-5478" alt="" data-id="5478" width="1333" height="2000" title="Linda Hermans Photography-Food Photography-Outdoors shoot Florence-8" src="https://lindahermansphotography.com/wp-content/uploads/2022/07/Linda-Hermans-Photography-Food-Photography-Outdoors-shoot-Florence-8-682x1024.jpg" data-src="https://lindahermansphotography.com/wp-content/uploads/2022/07/Linda-Hermans-Photography-Food-Photography-Outdoors-shoot-Florence-8-682x1024.jpg" loading="lazy" data-sizes="{"thumbnail":{"height":150,"width":150,"url":"https://lindahermansphotography.com/wp-content/uploads/2022/07/Linda-Hermans-Photography-Food-Photography-Outdoors-shoot-Florence-8-150x150.jpg","orientation":"landscape"},"medium":{"height":300,"width":200,"url":"https://lindahermansphotography.com/wp-content/uploads/2022/07/Linda-Hermans-Photography-Food-Photography-Outdoors-shoot-Florence-8-200x300.jpg","orientation":"portrait"},"large":{"height":1024,"width":682,"url":"https://lindahermansphotography.com/wp-content/uploads/2022/07/Linda-Hermans-Photography-Food-Photography-Outdoors-shoot-Florence-8-682x1024.jpg","orientation":"portrait"},"full":{"url":"https://lindahermansphotography.com/wp-content/uploads/2022/07/Linda-Hermans-Photography-Food-Photography-Outdoors-shoot-Florence-8.jpg","height":2000,"width":1333,"orientation":"portrait"}}" data-css="tve-u-1831de335d0" srcset="https://i0.wp.com/lindahermansphotography.com/wp-content/uploads/2022/07/Linda-Hermans-Photography-Food-Photography-Outdoors-shoot-Florence-8.jpg?resize=682%2C1024&ssl=1 682w, https://i0.wp.com/lindahermansphotography.com/wp-content/uploads/2022/07/Linda-Hermans-Photography-Food-Photography-Outdoors-shoot-Florence-8.jpg?resize=200%2C300&ssl=1 200w, https://i0.wp.com/lindahermansphotography.com/wp-content/uploads/2022/07/Linda-Hermans-Photography-Food-Photography-Outdoors-shoot-Florence-8.jpg?resize=768%2C1152&ssl=1 768w, https://i0.wp.com/lindahermansphotography.com/wp-content/uploads/2022/07/Linda-Hermans-Photography-Food-Photography-Outdoors-shoot-Florence-8.jpg?resize=1024%2C1536&ssl=1 1024w, https://i0.wp.com/lindahermansphotography.com/wp-content/uploads/2022/07/Linda-Hermans-Photography-Food-Photography-Outdoors-shoot-Florence-8.jpg?w=1333&ssl=1 1333w" sizes="(max-width: 1333px) 100vw, 1333px" />
<img data-lazy-fallback="1" class="tve_image wp-image-5305" alt="greek salad food and beverage photography" data-id="5305" width="1333" height="2000" title="Summer Greek salad with hard light and white wine" src="https://lindahermansphotography.com/wp-content/uploads/2022/07/Linda-Hermans-Photography-Greek-salad-hard-light-1-682x1024.jpg" data-src="https://lindahermansphotography.com/wp-content/uploads/2022/07/Linda-Hermans-Photography-Greek-salad-hard-light-1-682x1024.jpg" loading="lazy" data-sizes="{"thumbnail":{"height":150,"width":150,"url":"https://lindahermansphotography.com/wp-content/uploads/2022/07/Linda-Hermans-Photography-Greek-salad-hard-light-1-150x150.jpg","orientation":"landscape"},"medium":{"height":300,"width":200,"url":"https://lindahermansphotography.com/wp-content/uploads/2022/07/Linda-Hermans-Photography-Greek-salad-hard-light-1-200x300.jpg","orientation":"portrait"},"large":{"height":1024,"width":682,"url":"https://lindahermansphotography.com/wp-content/uploads/2022/07/Linda-Hermans-Photography-Greek-salad-hard-light-1-682x1024.jpg","orientation":"portrait"},"full":{"url":"https://lindahermansphotography.com/wp-content/uploads/2022/07/Linda-Hermans-Photography-Greek-salad-hard-light-1.jpg","height":2000,"width":1333,"orientation":"portrait"}}" data-css="tve-u-1831de335e1" srcset="https://i0.wp.com/lindahermansphotography.com/wp-content/uploads/2022/07/Linda-Hermans-Photography-Greek-salad-hard-light-1.jpg?resize=682%2C1024&ssl=1 682w, https://i0.wp.com/lindahermansphotography.com/wp-content/uploads/2022/07/Linda-Hermans-Photography-Greek-salad-hard-light-1.jpg?resize=200%2C300&ssl=1 200w, https://i0.wp.com/lindahermansphotography.com/wp-content/uploads/2022/07/Linda-Hermans-Photography-Greek-salad-hard-light-1.jpg?resize=768%2C1152&ssl=1 768w, https://i0.wp.com/lindahermansphotography.com/wp-content/uploads/2022/07/Linda-Hermans-Photography-Greek-salad-hard-light-1.jpg?resize=1024%2C1536&ssl=1 1024w, https://i0.wp.com/lindahermansphotography.com/wp-content/uploads/2022/07/Linda-Hermans-Photography-Greek-salad-hard-light-1.jpg?w=1333&ssl=1 1333w" sizes="(max-width: 1333px) 100vw, 1333px" />
There is no right or wrong answer when it comes to photography and creativity, so I encourage you to think outside the box and enjoy the process of learning about light. Take many shots before and after making a change to observe the effects and find what works for you!
Summary A modifier in photography is anything the modifies or changes the light that is being used to light the subject.
Types of light modifier include:
Clouds Sheets & curtains Diffusers Household objects GOBOs Nature I'd love to know what your takeaway message is from this blog post - share it with me in the comments below!
<img data-lazy-fallback="1" class="tve_image wp-image-5762" alt="" data-id="5762" width="800" height="1200" title="light modifiers 1" src="https://lindahermansphotography.com/wp-content/uploads/2022/09/light-modifiers-1-683x1024.jpg" data-src="https://lindahermansphotography.com/wp-content/uploads/2022/09/light-modifiers-1-683x1024.jpg" loading="lazy" data-sizes="{"thumbnail":{"height":150,"width":150,"url":"https://lindahermansphotography.com/wp-content/uploads/2022/09/light-modifiers-1-150x150.jpg","orientation":"landscape"},"medium":{"height":300,"width":200,"url":"https://lindahermansphotography.com/wp-content/uploads/2022/09/light-modifiers-1-200x300.jpg","orientation":"portrait"},"large":{"height":1024,"width":683,"url":"https://lindahermansphotography.com/wp-content/uploads/2022/09/light-modifiers-1-683x1024.jpg","orientation":"portrait"},"full":{"url":"https://lindahermansphotography.com/wp-content/uploads/2022/09/light-modifiers-1.jpg","height":1200,"width":800,"orientation":"portrait"}}" data-css="tve-u-1831dec8eb3" srcset="https://i0.wp.com/lindahermansphotography.com/wp-content/uploads/2022/09/light-modifiers-1.jpg?resize=683%2C1024&ssl=1 683w, https://i0.wp.com/lindahermansphotography.com/wp-content/uploads/2022/09/light-modifiers-1.jpg?resize=200%2C300&ssl=1 200w, https://i0.wp.com/lindahermansphotography.com/wp-content/uploads/2022/09/light-modifiers-1.jpg?resize=768%2C1152&ssl=1 768w, https://i0.wp.com/lindahermansphotography.com/wp-content/uploads/2022/09/light-modifiers-1.jpg?w=800&ssl=1 800w" sizes="(max-width: 800px) 100vw, 800px" />
<img data-lazy-fallback="1" class="tve_image wp-image-5763" alt="" data-id="5763" width="800" height="1200" title="light modifiers 2" src="https://lindahermansphotography.com/wp-content/uploads/2022/09/light-modifiers-2-683x1024.jpg" data-src="https://lindahermansphotography.com/wp-content/uploads/2022/09/light-modifiers-2-683x1024.jpg" loading="lazy" data-sizes="{"thumbnail":{"height":150,"width":150,"url":"https://lindahermansphotography.com/wp-content/uploads/2022/09/light-modifiers-2-150x150.jpg","orientation":"landscape"},"medium":{"height":300,"width":200,"url":"https://lindahermansphotography.com/wp-content/uploads/2022/09/light-modifiers-2-200x300.jpg","orientation":"portrait"},"large":{"height":1024,"width":683,"url":"https://lindahermansphotography.com/wp-content/uploads/2022/09/light-modifiers-2-683x1024.jpg","orientation":"portrait"},"full":{"url":"https://lindahermansphotography.com/wp-content/uploads/2022/09/light-modifiers-2.jpg","height":1200,"width":800,"orientation":"portrait"}}" data-css="tve-u-1831dec8eb7" srcset="https://i0.wp.com/lindahermansphotography.com/wp-content/uploads/2022/09/light-modifiers-2.jpg?resize=683%2C1024&ssl=1 683w, https://i0.wp.com/lindahermansphotography.com/wp-content/uploads/2022/09/light-modifiers-2.jpg?resize=200%2C300&ssl=1 200w, https://i0.wp.com/lindahermansphotography.com/wp-content/uploads/2022/09/light-modifiers-2.jpg?resize=768%2C1152&ssl=1 768w, https://i0.wp.com/lindahermansphotography.com/wp-content/uploads/2022/09/light-modifiers-2.jpg?w=800&ssl=1 800w" sizes="(max-width: 800px) 100vw, 800px" />


0 comments