Have you ever come away from a photoshoot that you spent hours on and felt disappointed that you didn't get the shots you wanted? Do you often feel frustrated that you're not making progress with your composition and styling skills? I feel you - I've been there many times before too. That's why I started preparing for all my shoots and now I rarely have those "off" days! These 7 simple steps to planning and executing a successful food photoshoot are going to help you take better images and make the next shoot way more enjoyable!
Increase your chances of success
When I first started spending more time doing food photography at home, I would often just wing it and see what happens. I knew what I was going to shoot but I didn't really prepare for the whole session, which meant my images often didn't turn out as well as I had hoped and I wasn't really improving my styling and composition skills. This left me feeling frustrated and I sometimes even questioned my abilities altogether.
That all changed when I started planning my shoots in advance!
Even if I spend just 30 minutes beforehand planning my shoot by following the steps below I find that my photoshoots are much more successful and I enjoy them a lot more. It gives me a chance to properly explore different ideas and imagine how I can bring my visions to life, rather than scrambling about and hoping for the best.
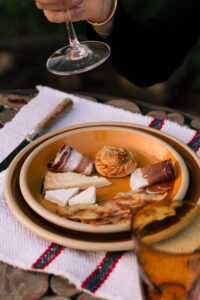
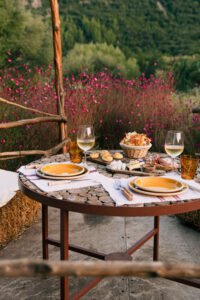
My images went from this:
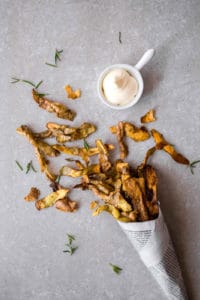
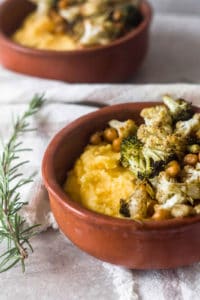
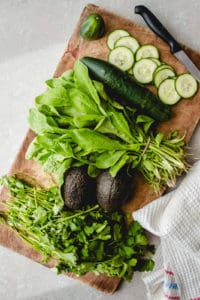
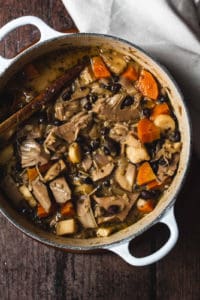
To this:

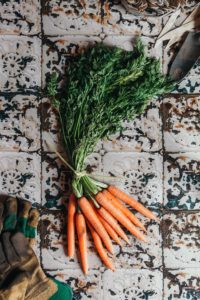
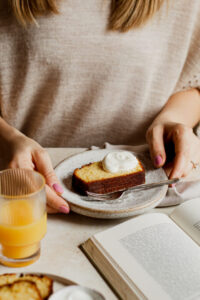
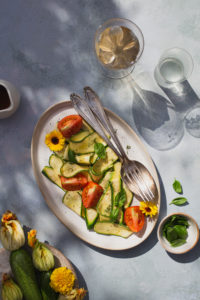
Of course, I have invested in better equipment and props in the meantime too, but even the images I was taking when I had very little in the way of photography gear were far better when planned my shoot first. For example, the two flatlays above were taken at a time when I was living with my mother-in-law in Argentina and didn't own any props myself, nor a tripod. All I had was a giant stone floor tile as a backdrop (which was heavy AF) and someone else's crockery.
The key was planning and sketching my images in advance, so I could make the most of what I had, rather than dwell on what I didn't have.
Let's take a look at the seven steps I take before every single shoot to help me take better pictures and continue to improve my photography knowledge and skills!
Prefer video? Watch my 10 minute video on planning a photoshoot!
Planning phase
Before you think about picking up your camera, let's plan the shoot on paper. I know this sounds boring and perhaps a waste of time, but trust me - planning ahead will make such a difference to the images you capture! You'll come away from the shoot grinning from ear to ear because you actually got the shots you wanted and didn't spend hours and hours to get them.
Let's take a look at how to plan a successful food photoshoot.
1. Choose your hero subject
This is the easy part; what is the main subject of your shoot? This is the dish or ingredient that you're focusing on and is where you want to draw the viewer's attention to right away.
It might be a delicious pasta recipe, a punnet of fresh strawberries, a mug of hot chocolate or even a product such as a bag of flour.
Once you've decided on your main subject, you can starting thinking about the overall story of the photoshoot.
2. What story do you want to tell?
Storytelling is a very powerful tool when it comes to photography and a good story has the ability to not only capture someone's attention but hold it for a while too.
By imagining what could be happening in someone's life when they're about to eat, drink or work with the main subject, you can create an engaging story that invites the viewer to feel part of the scene, rather than just being an onlooker.
So, think about your main subject and write down some ideas about what the story could be. Are they warming up on a cold winter's day with a steaming mug of hot chocolate? Perhaps they are cooking a romantic pasta dish for their partner, or having a picnic outside with fresh strawberries. Maybe they're baking cookies with their favourite brand of flour.
Now that you have a story, you can think about how to bring it to life! What mood do you want to create and how you can evoke that mood with colours, props and supporting elements? If someone is baking, they will probably be in the kitchen with other baking utensils and ingredients around them. It might be messy and chaotic. Think about what kind of workspace they have; it could be a rustic, country kitchen or a sleek modern one.
Write down all the things you can use to create this story, from the props and other elements you might want to include in the scene as well as colours and materials (e.g. wood, fabric) that you imagine for it. Consider the type of light you'll use too; hard or soft, and which direction it will come from.
Here is an example of how storytelling can enhance an image. The image below on the left was one of the first recipes that I ever shot for my blog (a ginger and turmeric latte in case you're wondering). It's not bad but there's not much going on, just two mugs on a board and a tea towel. Now, compare it to the image on the right. You can immediately imagine that it's a chilly day and you've just come home from a walk outside, you've taken off your gloves and scarf and are pouring yourself a lovely mug of hot chocolate and have a book to read next to the fire. The props in the background and around the main subject all help to set the scene and tell a bigger story.
Need more help?
This 50+ page ebook is packed with tips, case studies and worksheets to help you effectively plan your shoots and add emotive, visual narratives to your food photos.
3. Sketch ideas
Now you're going to put all these written ideas into some rough sketches that you can refer to during your shoot. Don't worry if you're not "good" at drawing, shapes and lines are enough!
Take a sheet of paper and draw a series of rectangles in portrait orientation (I shoot in portrait more often than landscape, but do whatever orientation works for you).
Next, think about the notes you've written for the story you want to tell. Imagine what kind of shots you could take that will tell that story and draw them into your rectangles. Make notes next to your sketches if it helps to remind yourself of the shooting angles, props and colours you want to include in each frame.
You could plan a series of images showing the process of baking cookies, starting with the ingredients and ending with the finished baked goods. It might be a single subject at different angles or at multiple moments of being enjoyed, such as pouring hot chocolate into a mug and then being served with whipped cream and biscuits in front of the fire. Try to imagine what is happening at the moment just before and after you release the shutter and include supporting elements and props to help build the scene.
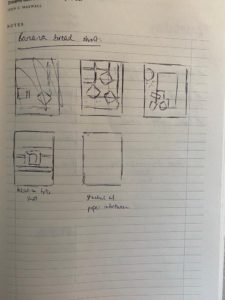
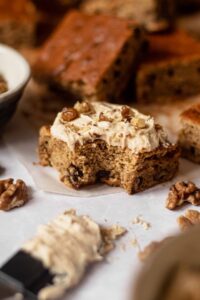
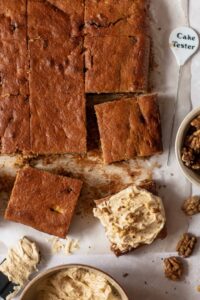
Below are some sketches that I did for a banana bread with peanut butter icing back when I had a recipe blog! You can see how the first and third sketches are very similar to the final images. I used them as guides for composition and added additional elements during the shoot or adjusted the angle in the moment.
Hints and tips
Something I also like to do is to number my sketches in order that I should shoot them. If I want to take a bite out of my food at some point, I should make sure I've done all the shots with the entire dish first! Numbering your shots like this will help ensure you don't miss any of your ideas.
Sketching out your scenes before the shoot is also a great way to practice specific composition techniques that you want to improve. For example, if you want to practice the rule of thirds or the golden triangle, then draw those composition grids into the empty rectangles first, to help guide the positioning of elements in the frame.
It can also be a good way to practice shooting at a particular angle. If you find yourself shooting at 45 degrees a lot, you might want to sketch some straight on shots to remind yourself to do it. Or if you struggle with flatlay compositions, then drawing some ideas first can be a good way to encourage yourself to try them!
TOP TIP: don't plan too many shots the first few times! You don't want to put too much pressure on yourself and get upset that you weren't able to do them all. Start with three or four and increase your chances of having a successful food photoshoot!
How to find your food photography style
4. Get inspired
If you find yourself lacking inspiration for your story and sketches, don't be afraid to go and look for ideas to shape your own.
Pinterest is one of my favourite places to get inspiration. Simply type "[insert food here] photography" into the search bar and scroll through the content it shows me. If you see something you love, why not try recreating it! Sketch the composition and use your own props to make your own version of the image.
I often find that simply looking at other images on Pinterest and Instagram for a few minutes is enough to get my creative juices flowing and sets me off with a bunch of other ideas!
Note: if you do recreate something and it's very similar to the original image, it's nice to tell people where your inspiration came from if you decide to share it on social media. It might even be a good way to connect with other artists and let them know how they helped you grow your skills!
Execution phase
Ok, now for the part you've been waiting for - it's shoot day! Let's go through how to execute a successful food photoshoot.
5. Gather your props and prepare the scene
Since you've already made notes of the props you need for the photoshoot, you can simply gather everything you need from your collection and prepare your scene.
Get your backdrop ready and position it as needed with respect to your light source. Lay out all the props you decided to use and start placing them on your backdrop using the compositions from your sketches (if you numbered your shots, do them in order).
Understanding light in food photography
Take your time to prepare each composition and use objects to stand-in for your hero until you're happy with how it all looks through your camera. Then insert your hero, check the focus is on point and take the shot!
Boost Your Skills. Join 800+ Subscribers.
Become a free member and get free food photography tips delivered to your inbox as well as exclusive resources as well a 10% discount in the online store!
6. Try to do as many of the shots you sketched out
Work your way through your planned sketches and remember that you don't have to rigidly copy everything you drew. The reality of how the scene looks through your camera might be different to what you imagined, so go with the flow and make adjustments as necessary.
It may happen that the image doesn't turn out at all as you sketched and that's totally fine as well - don't get yourself down about it. We can only learn by trying and failure is part of growth and progress! Make notes of what worked and what didn't and bear them in mind next time you plan something similar - I'm sure you'll have a successful food photoshoot with this approach!
7. Allow time to freestyle
Just like you give yourself freedom to make adjustments to your sketches when shooting, allow yourself some time to just shoot what feels good too! A successful food photoshoot doesn't just mean you have to tick off everything on your list - it means coming away from it feeling happy with what you did and that you've made progress in your work.
Sometimes we see things we didn't expect, or suddenly a whole new idea springs to mind mid-shoot. Let yourself play and try new things, even if it's not what you planned - you never know what beautiful images you might create.
I hope these tips will help you plan and execute a successful food photoshoot soon! Please leave any comments or further questions below, I'd love to hear from you!

thank you so much Linda! what you share is so helpful! thank you for your help!
I’m glad this post was helpful for you Monica! Thank you for reading!
A brilliant blogpost Linda, thank you for sharing your knowledge. I especially love the points on storytelling!
Can’t wait for my next shoot!
Thank you so much for taking the time to read the post Davinia! I hope it helps you with your next shoot! 🙂
Thank you Linda for sharing your knowledge, tips, style and so much more! I love everything about this post and will make sure I plan my shots from now on 🙂
Thank you so much for reading this post Vane! I’m glad it was helpful for you; I hope you’ll enjoy the planning process and that you notice a difference in your work when you do it! 🙂